
Why Another Blog about Raspberry Pi and Kubernetes?!
There are so many out there why create another one? My goals were to create a cluster then build, publish, and run Docker images on it and I couldn’t find that one-stop-shop for that. So here we are, another blog. And, as usual, I’m sleeping on the shoulders of giants and have provided many of their links at the end.
All of the source code is available here. There are a bunch of words in this post, but the repo has a checklist with just the bare details.
If you’re only interested in trying K8s and Helm locally, you can stop reading and install Docker Desktop, Podman, or Rancher Desktop.
This post assumes you have a passing familiarity with Docker, Kubernetes, and Helm.
Creating the Cluster
You can install full K8s or Rancher’s lightweight version, K3s. I chose to install K3s and it went quite smoothly by following Rancher’s quick start.
To be a good test, I needed at least two nodes for scaling and to make sure networking and image pulling worked with a local Docker Registry.
Pi Hardware
I first started out trying to deploy to the following Pis I had lying around (it’s very hard to get new ones now).
- Raspberry Pi 2B for the control plane and worker 😄
- Raspberry Pi B for a worker 😢
- Raspberry Pi ZeroW for a worker 😢
The deployment went well, but when running on the B and Zero I got an illegal instruction error. Googling, I found that the 2B is the minimum Pi hardware for K8s, so I had to switch to plan B – make that plan 4B.
- Raspberry Pi 4B for the control plane and worker (hostname =
k3s-server) 😄 - Raspberry Pi 2B for a worker (hostname =
k3s-worker-1) 😄
Windows
I created the Pis headless and used a Windows 10 box to run docker, kubectl, and helm clients as well as ssh to access them as needed. Even though I used Windows, everything here should run on Linux or a Mac. Some of the script snippets are in PowerShell, but they can easily be ported to another scripting language (PowerShell does run nicely on Linux and Mac. Just sayin’.)
Some of the applications I used are as follows:
- OpenSSH Client is enabled to get access to the Pis
- Open Settings (Win+I)->Apps->Optional Features and search for SSH to find the
OpenSSH Client - Create an ssh key pair for accessing the Pis with
ssh-keygen
- Open Settings (Win+I)->Apps->Optional Features and search for SSH to find the
- Docker Desktop for WSL 2, which installs docker and kubectl apps. For this scenario, I stopped Docker Desktop on Windows to avoid getting confused as to which one I was hitting.
- helm.exe, which can be downloaded from here or with
Install-Package - .NET 6
- Visual Studio Code with these extensions
- Docker extension from MS
- Kubernetes extension from MS
- C# extension from MS
- Lens for K8s GUI management
In this scenario, the application source code lived on Windows, but there are some great VSCode extensions (Remote-*) from MS that allow you to run VSCode locally and use files and a prompt on the remote machine. You can even debug!
Raspberry Pi OS Setup
This is the same for all the K8s nodes.
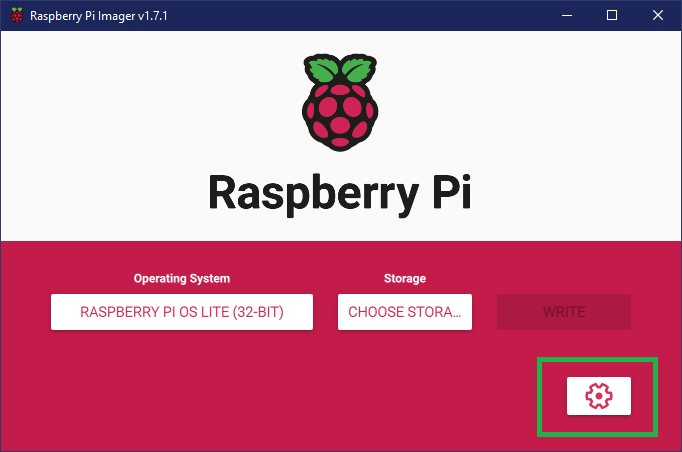
I used the relatively new Raspberry Pi Imager tool from the Raspberry Pi site. To make them headless, I chose the Raspberry Pi OS Lite(32-bit) Bullseye port from 2022-01-18. One of the nice things about the Imager is that you can do much of the configuration when building the image instead of manually after boot. I clicked the gear in the lower right to access the Advanced Options.
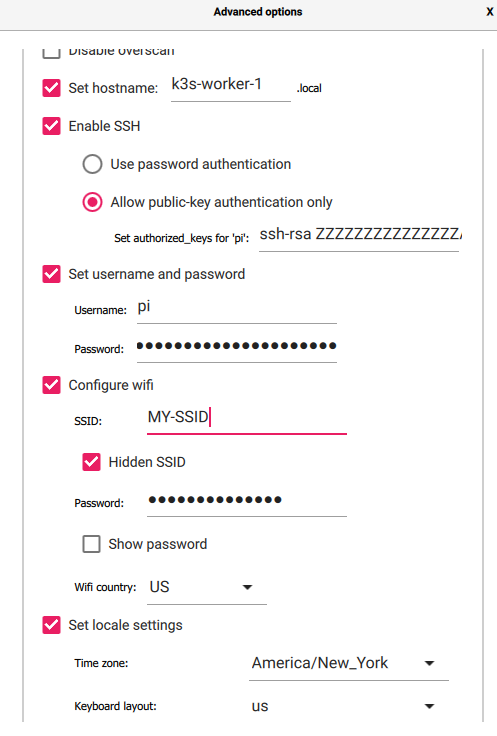
I then updated these settings:
- Set hostname
- Enable SSH and set the public key I created on the Windows box
- Set username and password
- Configure wifi
- Set locale settings
After booting up, I ssh’ed into each server and set a static IP per the Raspberry Pi directions. The gist is to edit /etc/dhcpcd.conf, which has several examples commented out. My Pis are wired so I uncommented out the eth0 block and updated the values to look like the following since I’m using 192.168.1.x subnet.
interface eth0
static ip_address=192.168.1.200/24
#static ip6_address=fd51:42f8:caae:d92e::ff/64
static routers=192.168.1.1
static domain_name_servers=192.168.1.1 8.8.8.8
I have the DHCP server in my router only serve up to `192.168.1.199 so I can use static IPs 200-255. I found that the workers couldn’t use the name, and had to use the server’s IP.
K3s also needs a configuration tweak. I edited /boot/cmdline.txt and added cgroup_memory=1 cgroup_enable=memory to the end of the first line. (If you don’t do that, K3s will tell you to do it when it fails to start the first time.) Mine looks like this now:
console=serial0,115200 console=tty1 root=PARTUUID=a48fb9ae-02 rootfstype=ext4 fsck.repair=yes rootwait cgroup_memory=1 cgroup_enable=memory
You’ve may have read that K8s doesn’t like to have swap turned on, so it’s best to turn it off on each node. k3s check-config will warn you about it.
# on all Pis
sudo service dphys-swapfile stop
sudo systemctl disable dphys-swapfile.service
Installing K3s on k3s-server
Rancher’s quick start makes it pretty easy to setup a server by having a script you can download and run to install K3s.
curl -sfL https://get.k3s.io | sh -
For the workers, you need to get the server’s token which is in /var/lib/rancher/k3s/server/node-token
For connecting to the cluster remotely with kubectl or tools like Lens, grab the config from /etc/rancher/k3s/k3s.yaml. I copied it to ~/.kube/k3s-config on Windows. After copying it, I edited it to change the clusters.cluster.server value from localhost to k3s-server as shown in the snippet below.
apiVersion: v1
clusters:
- cluster:
    certificate-authority-data: ...
    server: https://k3s-server:6443 <<< change to server name from 127.0.0.1
  name: default
...
Installing K3s on k3s-worker-1
Again, Rancher’s quick start makes it pretty to do for the workers, too. Remember that token I saved from the server, and its static IP? Here’s where I used them.
export K3S_TOKEN="<token from server's /var/lib/rancher/k3s/server/node-token>"
export K3S_SERVER="https://<server's static ip>:6443"
curl -sfL https://get.k3s.io | K3S_URL=$K3S_SERVER K3S_TOKEN=$K3S_TOKEN sh -
I tried using the name (k3s-server) in K3S_SERVER environment variable instead of IP, but the worker got level=error msg="failed to get CA certs: Get \"https://127.0... errors in its log and didn’t connect as a node.
Verifying the Install
At this point, the cluster should be up and running. I ran some kubectl commands to verify it. These can be run on the server, or a developer machine with kubectl using the config pulled from the server (and the server value edited).
# on server, or developer box
kubectl version
kubectl cluster-info
kubectl get nodes -o wide
It may take a couple minutes for the worker to show up in get nodes:
pi@k3s-server:~ $ sudo kubectl get nodes
NAME           STATUS   ROLES                  AGE     VERSION
k3s-worker-1   Ready    <none>                 2m49s   v1.22.7+k3s1
k3s-server     Ready    control-plane,master   3h53m   v1.22.7+k3s1
On each node, you can view the status and a bit of the logs for K3s with this command if you are having issues, or see the troubleshooting section.
# on k3s node
sudo systemctl status k3s
You can also check the K3s configuration. I got some errors about some environment variables and links, but haven’t seen any problems from them.
# on k3s node
k3s check-config
Deploying NGINX
Now that the cluster is up and running, let’s try deploying something! Nginx is a popular reverse proxy we can use and hit with the browser. Make sure you pick an image that is built for your hardware (arm for the Pi). If you grab one of the popular ones like Bitnami’s you may get an obscure exec format error when running the pod, which tells you the Docker image isn’t for your OS.
# on developer box
helm repo add shubhamtatvamasi https://shubhamtatvamasi.github.io/helm
helm install my-nginx shubhamtatvamasi/nginx --version 0.1.12
The directions that dump out after the deploy tell you how to use K8s port forwarding to get access to Nginx from outside with bash. Here’s the Powershell version:
$env:POD_NAME=$(kubectl get pods --namespace default -l "app.kubernetes.io/name=nginx,app.kubernetes.io/instance=my-nginx" -o jsonpath="{.items[0].metadata.name}")
$env:CONTAINER_PORT=$(kubectl get pod --namespace default $env:POD_NAME -o jsonpath="{.spec.containers[0].ports[0].containerPort}")
kubectl --namespace default port-forward $env:POD_NAME 8080:$env:CONTAINER_PORT
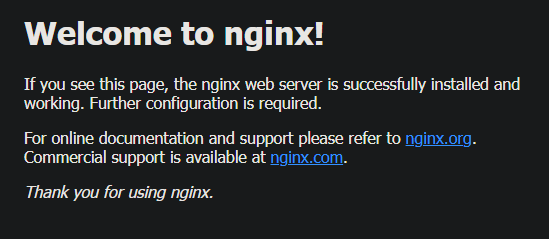
The kubectl port-forward command will block until you use Ctrl+C to stop it. In the browser http://localhost:8080/ and should show this:
Installing Docker
To build images in Docker on the Pi, you must install Docker on a server. I chose to install it on my beefier 4B (k3s-server). This didn’t go as smoothly as K3s. After a few trials, I found these steps to work. First, install docker.
# on k3s-server
curl -sSL https://get.docker.com | sh
At the end, you’ll see a message that starts like this.
================================================================================

To run Docker as a non-privileged user, consider setting up the
Docker daemon in rootless mode for your user:

    dockerd-rootless-setuptool.sh install

Visit https://docs.docker.com/go/rootless/ to learn about rootless mode.
After chasing links and trying different methods, I ended here that tells says to add the user to the docker group.
# on k3s-server
sudo usermod -aG docker $USER
exit
After logging out and back in, I could use docker.
# on k3s-server
docker ps
docker images
docker run hello-world
docker system prune
Since I wanted to build from my developer box, I set up a Docker context to point to the Pi.
# on developer box
docker context create k3s-server --docker "host=ssh://pi@k3s-server"

# use the context to access Docker on k3s-server
docker –context k3s-server images

# set k3s-server as the default context
docker context use k3s-server
Once that was done I could run all the docker commands on the developer box, even build an image from local source code, which is covered below.
Installing Docker Registry
When K3s deploys a pod, it pulls Docker images from a registry. Docker Hub is an example of a public image registry. You can push public images for free, but in most cases you have to pay to push private images. For my scenario I want it to be self-contained (for the most part), so I added a local registry.
Like Docker, I installed the Docker Registry on the 4B. The registry itself runs as a Docker container and you simply run the image as below. --restart always will restart the registry on reboot.
# on k3s-server or the developer box
docker run -d -p 5000:5000 --restart always --name registry registry:2
I cover pushing the ASP.NET example below.
If you try to deploy at this point, you will get ErrImagePull in the pod and doing a kubectl pod describe will show http: server gave HTTP response to HTTPS client.
I found many suggestions to fix this such as editing daemon.json or override.conf, but those didn’t work for me. What worked for me was to create a file /etc/rancher/k3s/registries.yaml on each node and add a mirror entry for the registry server (do this on the server, too since it’s also a worker). Note you’ll probably have to create folders on the worker.
mirrors:
  "k3s-server:5000":
    endpoint:
      - "http://k3s-server:5000"
This is YAML so mind the whitespace. If you still get errors after rebooting or restarting k3s, triple check the indenting.
# restart k3s on k3s-server
sudo systemctl restart k3s

# restart k3s on k3s-worker-1
sudo systemctl restart k3s-agent
Running an ASP.NET App in the Cluster
It’s one thing to pull a Docker image from the hub and deploy it to the K8s cluster, but it’s another thing to build and deploy my own images to the cluster.
Creating the App
For the test app, I used the .NET 6 webapi template (dotnet new webapi -o dotnet-webapi). There are only a few changes I had to make to Program.cs to help it work better with my cluster.
All of the source, docker, and helm code is available here.
run.ps1has all the commands to build, push, and deploy the app.
Since I plan on running multiple apps in my cluster, I’ll use different URL paths for each one. For this one, I used http://k3s-server/web-api.
I added these two lines to set the base path of the app to /web-api. (For .NET 5 you can use BasePath in appsettings.json but that doesn’t work for .NET 6)
app.UsePathBase("/web-api");
app.UseRouting();
To show Swagger for a release build and avoid dealing with TLS (I’m going to assume it is terminated before we get to K8s), I commented out these lines.
//if (app.Environment.IsDevelopment())
...
// app.UseHttpsRedirection();
And finally, I added a root and health check endpoints.
app.MapGet("/", () => "dotnet-webapi. Check /web-api/health/live and /web-api/health/ready" );
app.MapGet("/health/ready", () => "ready" );
app.MapGet("/health/live", () => "live" );
Docker
VSCode’s Docker extension has a task to add a Dockerfile to the project (Ctrl+Shift+P then type Docker). It gives you a good starting point. I ran it then moved the Dockerfile to DevOps/Docker and adjusted the paths since they weren’t correct.
To create an image, I ran docker build and since my default context for the docker cli was k3s-server, the source files were transferred to the Pi and the image was built there.
# on developer box in dotnet-webapi
# snippet from run.ps1
$Tag = '0306a'
$imageName = 'dotnet-webapi'

docker build --rm `
             --tag ${imageName}:$Tag `
             --file ../../DevOps/Docker/Dockerfile `
             .
Pushing the Docker Image
For the K3s nodes to be able to pull the image, it must be pushed to the repository. I made sure to use a different tag for each build since I had issues with K3s not pulling an updated image with the same tag (and why would it?).
# on developer box in dotnet-webapi
# snippet from run.ps1
$Tag = '0306a'
$imageName = 'dotnet-webapi'
$dockerRegistry = 'k3s-server:5000'

docker image tag ${imageName}:$Tag $dockerRegistry/${imageName}:$Tag
docker push $dockerRegistry/${imageName}:$Tag
Creating the Helm Chart
Helm charts make it much easier to maintain K8s manifests. To add helm support to the app, I created a DevOps folder and ran this to create a helm subfolder with a new chart in it.
# on developer box in dotnet-webapi/DevOps
helm create helm
I only needed to changes the templates/deployment.yaml file in the chart by changing the port values in template.spec.containers from 80 and http to 8080 since I will have the app listen on 8080 (something higher than 1024).
The values.yaml file is the file that has the app-specific settings that populate the manifests. See the repo for the full details, but the main changes were for the repository and ingress port changes.
Installing the Helm Chart
Finally, I installed the web-api with helm. By default, Helm uses the current kubectl context, which I have set to k3s-server.
# on developer box in dotnet-webapi
# snippet from run.ps1
$valuesFile = ./DevOps/helm/values.yaml
$Tag = '0306a'
$imageName = 'dotnet-webapi'

helm upgrade --install --values $valuesFile $imageName --set', "image.tag=$Tag" . --wait
After a minute or two it returned (since I used --wait). And could see my weather forecast at http://k3s-server/web-api/WeatherForecast!

Troubleshooting
Here are a few commands if you have problems. Lens can also help point out issues.
# get status on server
sudo systemctl status k3s

# get status on worker
sudo systemctl status k3s-agent

# logs
journalctl -u k3s

# watch pods.
kubectl get pod -o wide -w

# look at the bottom for events if the pod isn't healthy
kubectl describe pod <podname>

# show installed charts
helm list

# dump out all the manifests for review
helm get all dotnet-webapi > /temp/webapi.helm
The repo’s run.ps1 shows how to do a helm dry run to dump out the manifests for review before deploying.
# uninstall on worker for reinstall
/usr/local/bin/k3s-agent-uninstall.sh
The End (phew!)
This has been a lot of words. I ran into quite a few issues trying to get this cluster up and running and have pages of notes of things that worked and didn’t work. Writing this down has helped clarify the process for me and I hope someone else has found it useful. I have successfully rebuilt the cluster using these directions and the checklist in the repo.
Links
- Rancher’s K3s doc
- Lens Kubernetes Tool
- Run Kubernetes on your Raspberry Pi cluster with k3s by Will Ho
- Installing fully-fledged vanilla Kubernetes on Raspberry Pi from Flant
- Raspberry Pi Cluster Episode 4 - Minecraft, Pi-hole, Grafana and More! by Jeff Geerling
- How To Install Docker and Docker-Compose On Raspberry Pi by Alemaño
- Get Started with Docker on Raspberry Pi by Alex Ellis