Customizing the Terminal
This is part two of a series of posts about my journey as a .NET developer moving from a Microsoft OS to macOS. In part 1 I covered the basic differences between macOS and Windows. I am a big command line user and may be what you call a “power” PowerShell user. I usually have two or more prompts open, and if there is any automation to be done, PowerShell is my scripting language of choice nowadays. In this episode, I’ll cover setting up the terminal on the Mac to be more like the Windows terminal.
PowerShell on macOS
Moving to Mac’s zsh shell from PowerShell is quite a leap. I have tons of muscle memory and scripts in PowerShell that can run anywhere (like my ForEach-Git), so why not use them? If you’re a Python or Perl person you’d install those on the Mac, so no need to fear the shell. Directions for installing it are here, but it can easily be installed with brew.
brew install --cask powershell
The defaults for PowerShell on the Mac are geared towards a Unix-like environment, so it will feel different, but you can configure it and iTerm2 (see below) to make it warm and fuzzy for a Windows developer.
I installed the usual PowerShell modules such as PoshGit, OhMyPosh, etc. with Install-Module. Then I copied my usual $Profile file on to the Mac. This is a company-agnostic file I’ve used for many years. It sets up PoshGit, OhMyPosh, aliases, helper functions, etc. and it pretty much worked. At the end of it, it optionally runs a CompanySpecific.ps1 file to add anything specific to your current environment.
Since this was the first non-Windows version of my $Profile, I had to make a few minor changes, which you can see in the file searching for $IsWindows. Here are some things that are different.
- n for notepad now TextEdit
- e for explorer now
open Set-PSReadlineKeyHandler -Key Tab -Function MenuCompleteSet-PSReadLineOption -BellStyle None -EditMode Windows
Use pwsh from any terminal to run PowerShell. However, you probably want iTerm2.
iTerm2
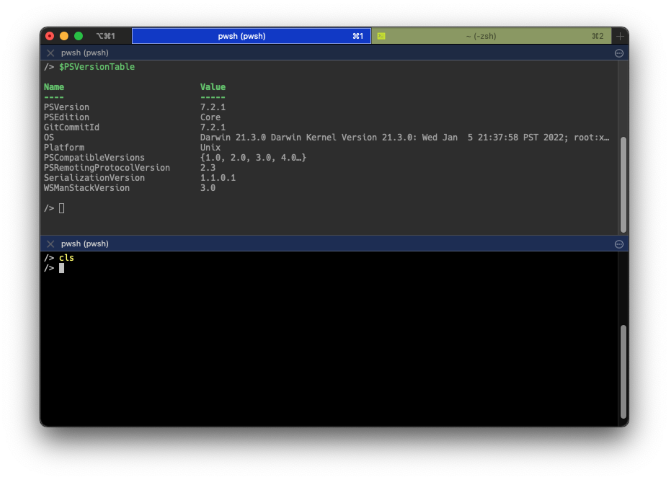
iTerm2 is a great terminal for macOS and pretty close to the Microsoft Terminal app for Windows. Like Terminal, it allows you to create profiles for various shells, or ssh connections. It also supports keyboard mapping and “Arrangements” to save your shell and window settings. Below is my default arrangement when iTerm starts. Once you get your tabs and layout, the “Arrangement”, the way you want it, use Shift+Cmd+S to save it. After it is saved, you can set it as the default.
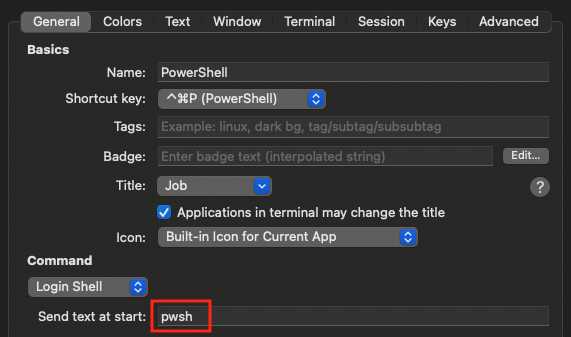
To add a PowerShell profile, use the configuration dialog (Cmd+,), and select profiles. Add one and tell it to run pwsh when it starts.
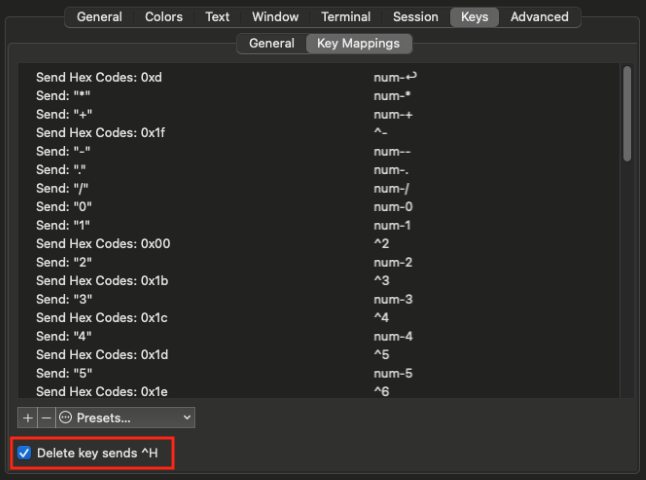
For the keys, I had problems getting home, end, word left/right, and backspace working. In my profile here I got everything working. In addition, I had to check the delete key setting as shown below.
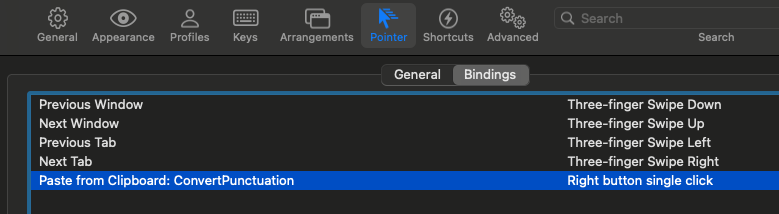
The only pointer change I made was to add an action for the right mouse click to paste the clip board.
Conclusion
In this blog, I covered how to get PowerShell and iTerm running on a macOS for folks that are used from Windows. I’m a couple of weeks into my mac journey and found this eased my migration.
Update
A month in and I’ve decided to stay with the Windows keyboard mapping as much as possible. Jumping from work during the day on a mac to side projects in the evening on Windows is too much of a context switch for this old dog. I can use thirty years of muscle memory to get the job done instead of pausing every time I try to use the clip board or move the cursor.
I found the Karabiner tool that does keyboard mapping has a ruleset named Windows shortcuts on macOS that gets me about 90% of the way. I’ve added a couple custom ones I may post once it is totally fleshed out.
For VSCode the Windows Default Keybindings allows you to use VSCode pretty much just as if you’re on Windows.
Links
- iTerm2
- My $Profile file copy or merge with your $Profile
- My iTerm2 PowerShell profile file. Import into iTerm2